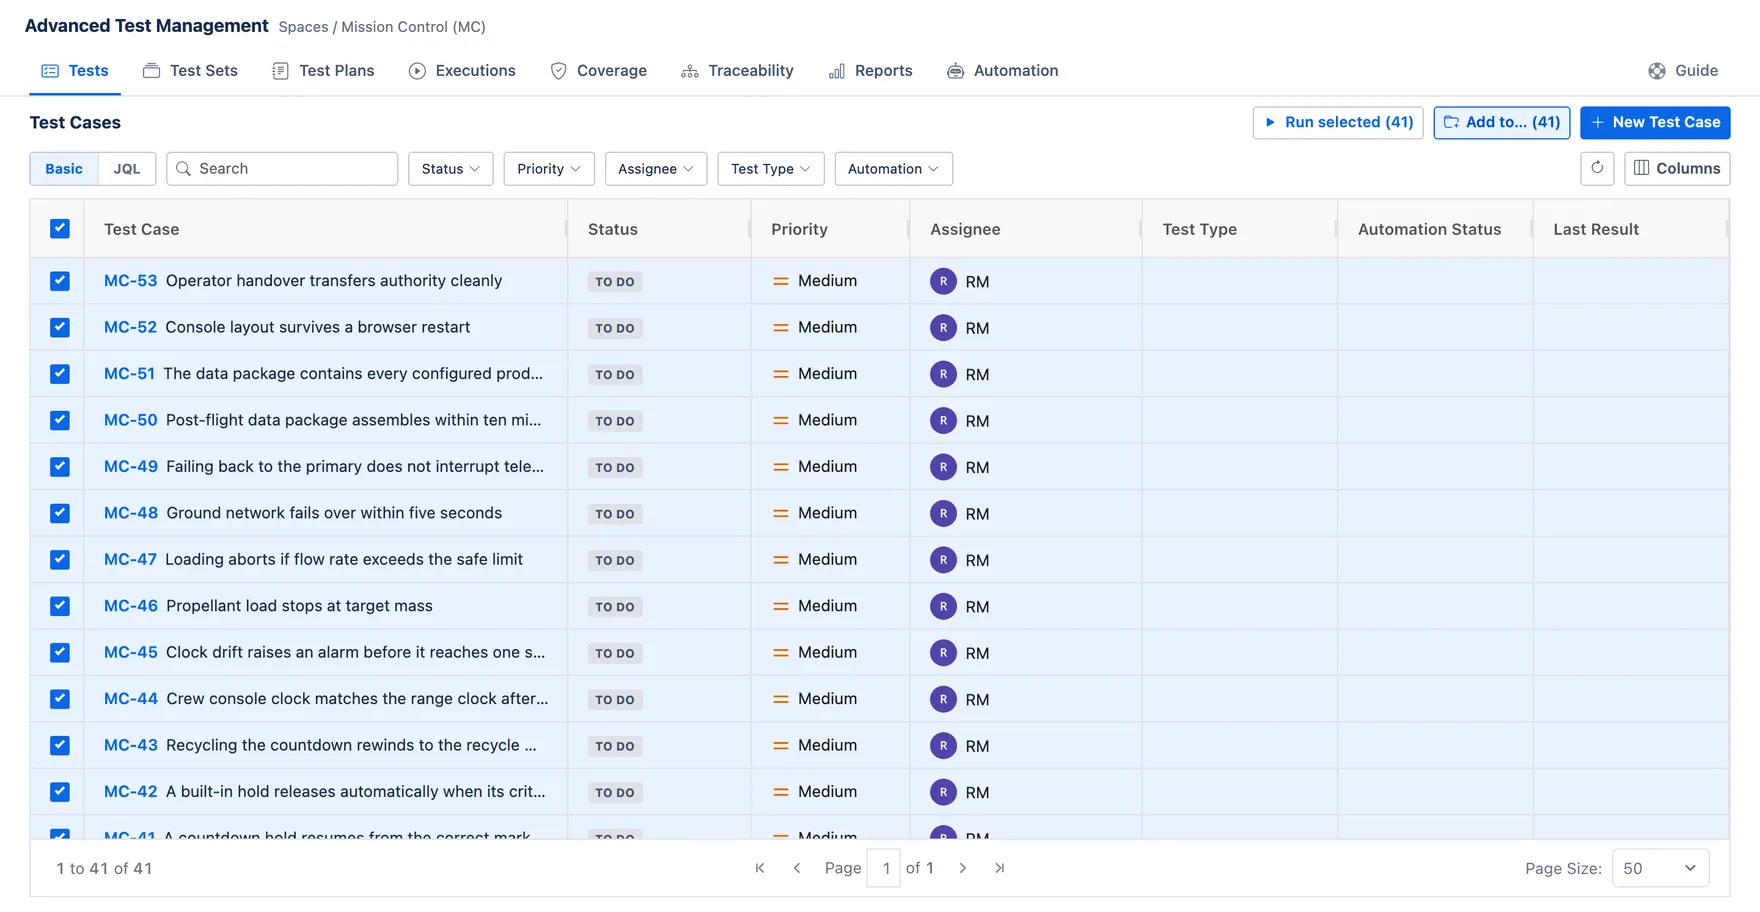
Tests tab
The Tests tab is your library of Test Cases for this project.
Create a case
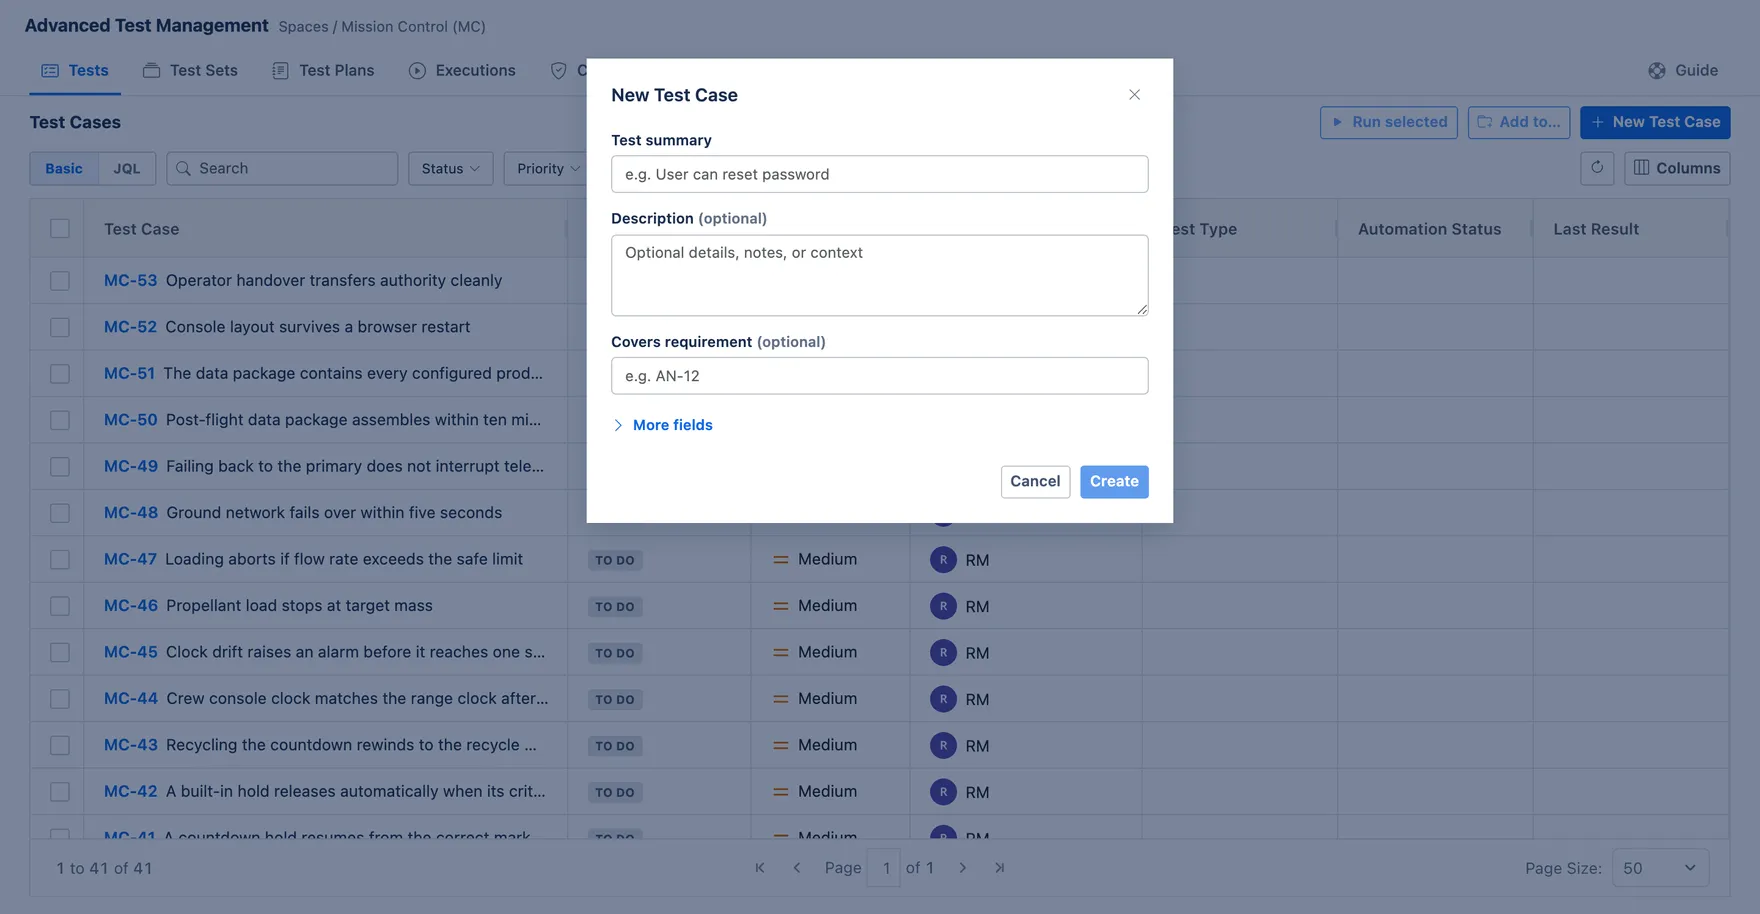
Section titled “Create a case”- Click New Test Case, give it a summary.
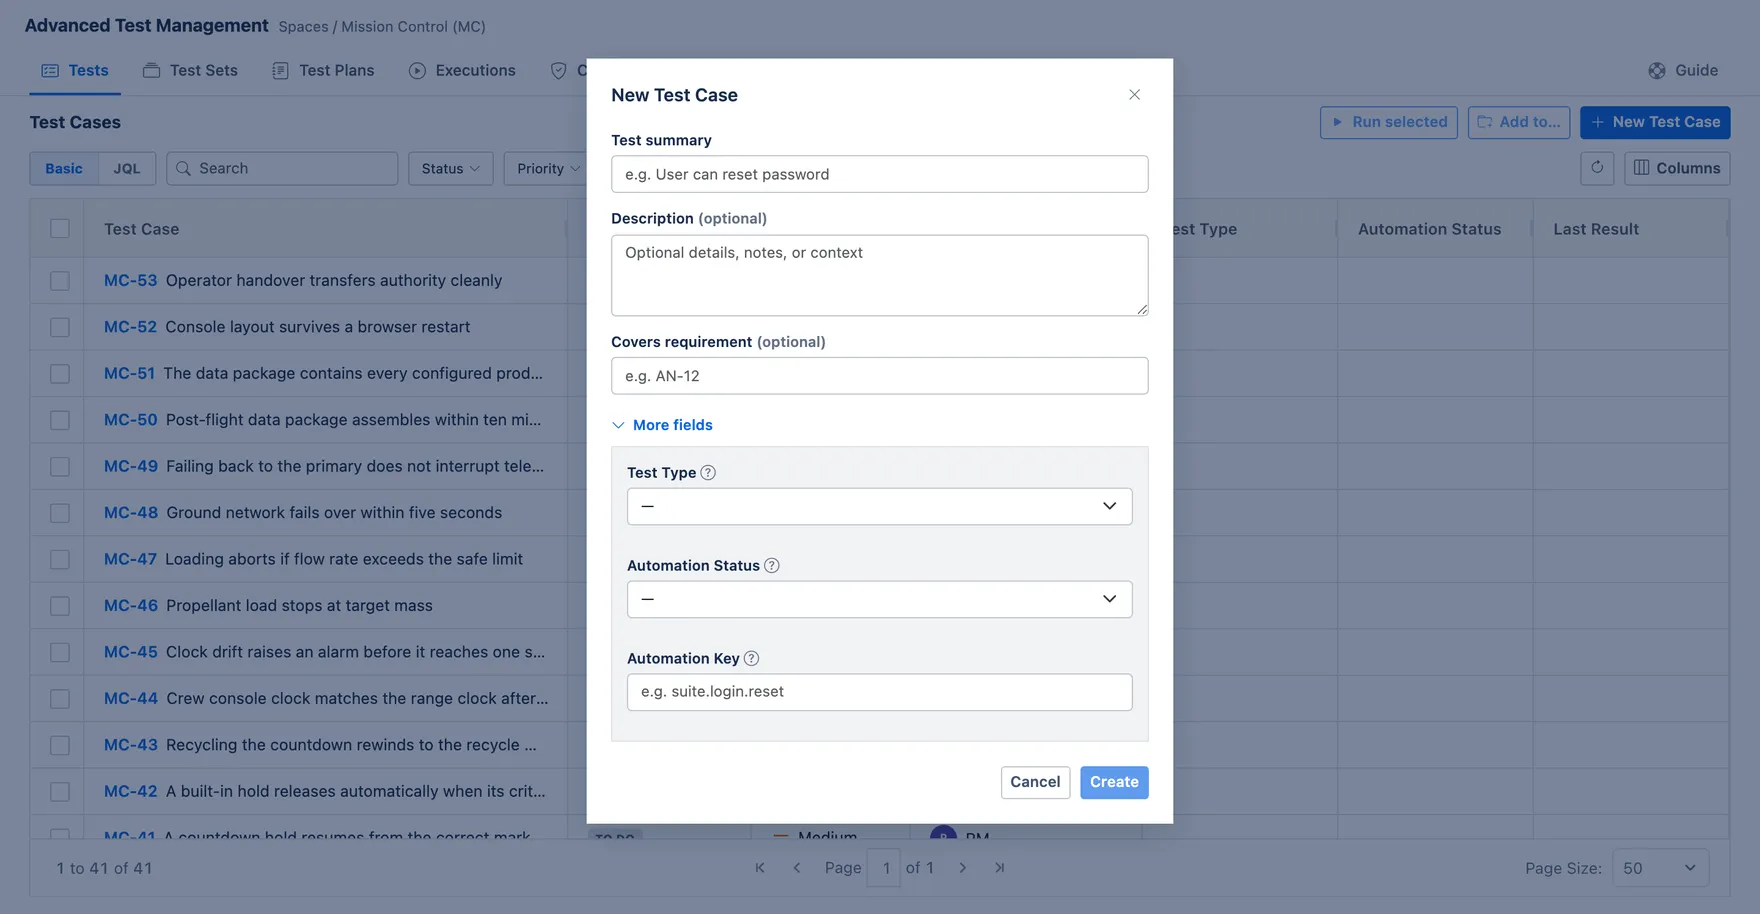
- Optionally expand More fields to set Test Type, Automation Status and an Automation Key.
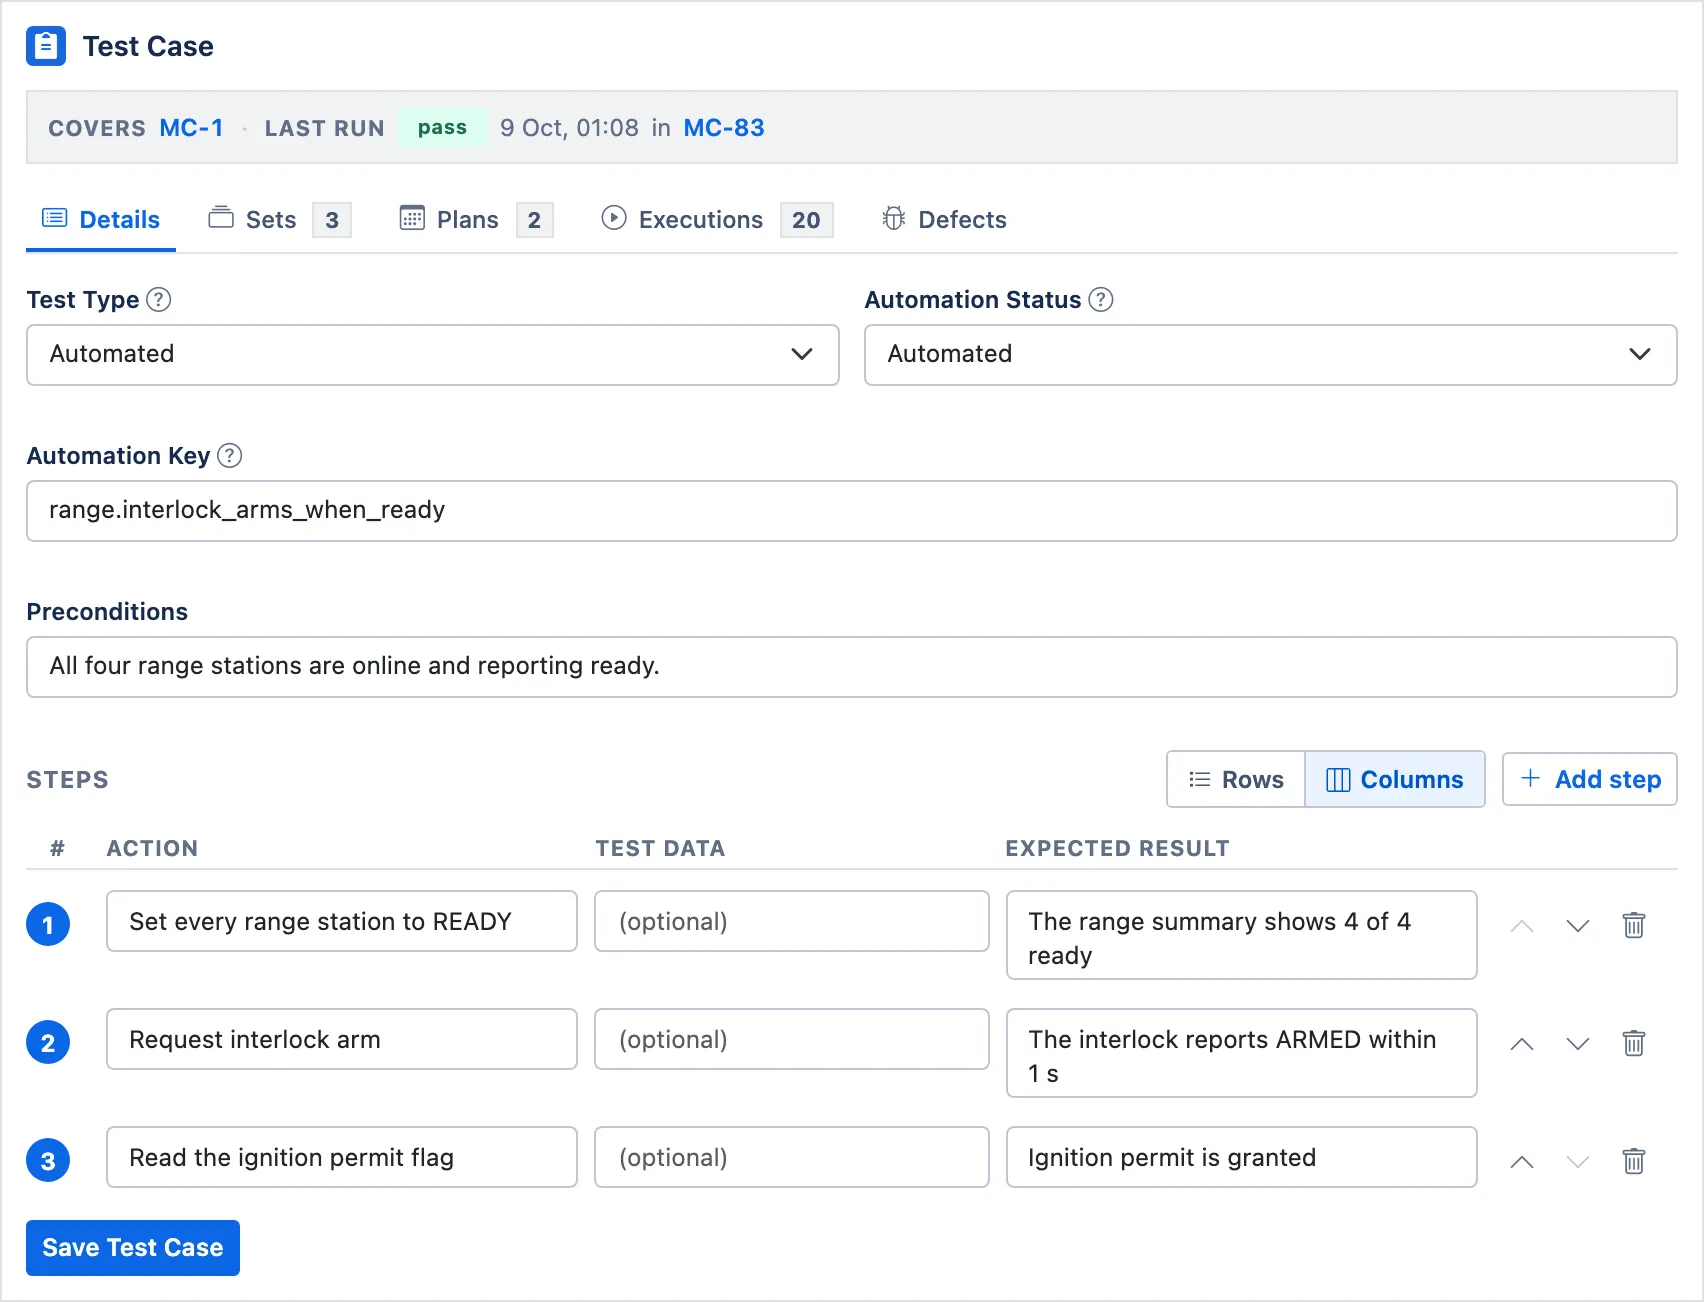
- Open the case (in the issue view) to add numbered steps — each with an action, optional test data and an expected result. Step boxes grow as you type.
A summary is all that is required. Covers requirement links the new case to a Jira work item straight away, which is what the Coverage and Traceability tabs read.
More fields holds the three app fields. You can leave them empty now and set them later on the case itself.
Steps live on the case, in the app’s panel on the work item. Each row is an action, optional test data and the result you expect, and the arrows beside a row move it up or down.
Handy things
Section titled “Handy things”- Columns — show/hide custom-field columns in the grid.
- Run selected — tick one or more cases and create a Test Execution from them.
- Click any row to open the case and edit steps & fields.
Ticking rows turns on both buttons at once: Run selected starts an execution from exactly those cases, and Add to… puts them in a Test Set or Test Plan. The count in each button is the number of cases you have ticked.